If you’re selling any kind of visual content like websites, downloads, or planners, Pinterest may be a viable marketing strategy for your business. But, if you’re like me, the thought of putting yourself out there and creating your first pin can seem daunting.
In this article, we walk you through a step-by-step process to show you how to create your first pin on Pinterest.
Ready? Let’s go.
Step 1: Log into Pinterest
- If you don’t already have one, create a Pinterest Business Account to access additional features like audience insights, current growing trends, scheduling tools, and analytics.
Step 2: Go to Create Pin
- From your Pinterest homepage, hover over the Pinterest Logo in the top-left corner.
- Under Create Content, select “Create Pin” from the drop-down menu.
Step 3: Add an Image
- Click the gray box that says “Drag and drop or click to upload.” Choose the image you want to use for your pin from your computer.
- Tip: Make sure the image is vertical, ideally 1000 x 1500 pixels for the best performance.
Step 4: Write Your Pin Title
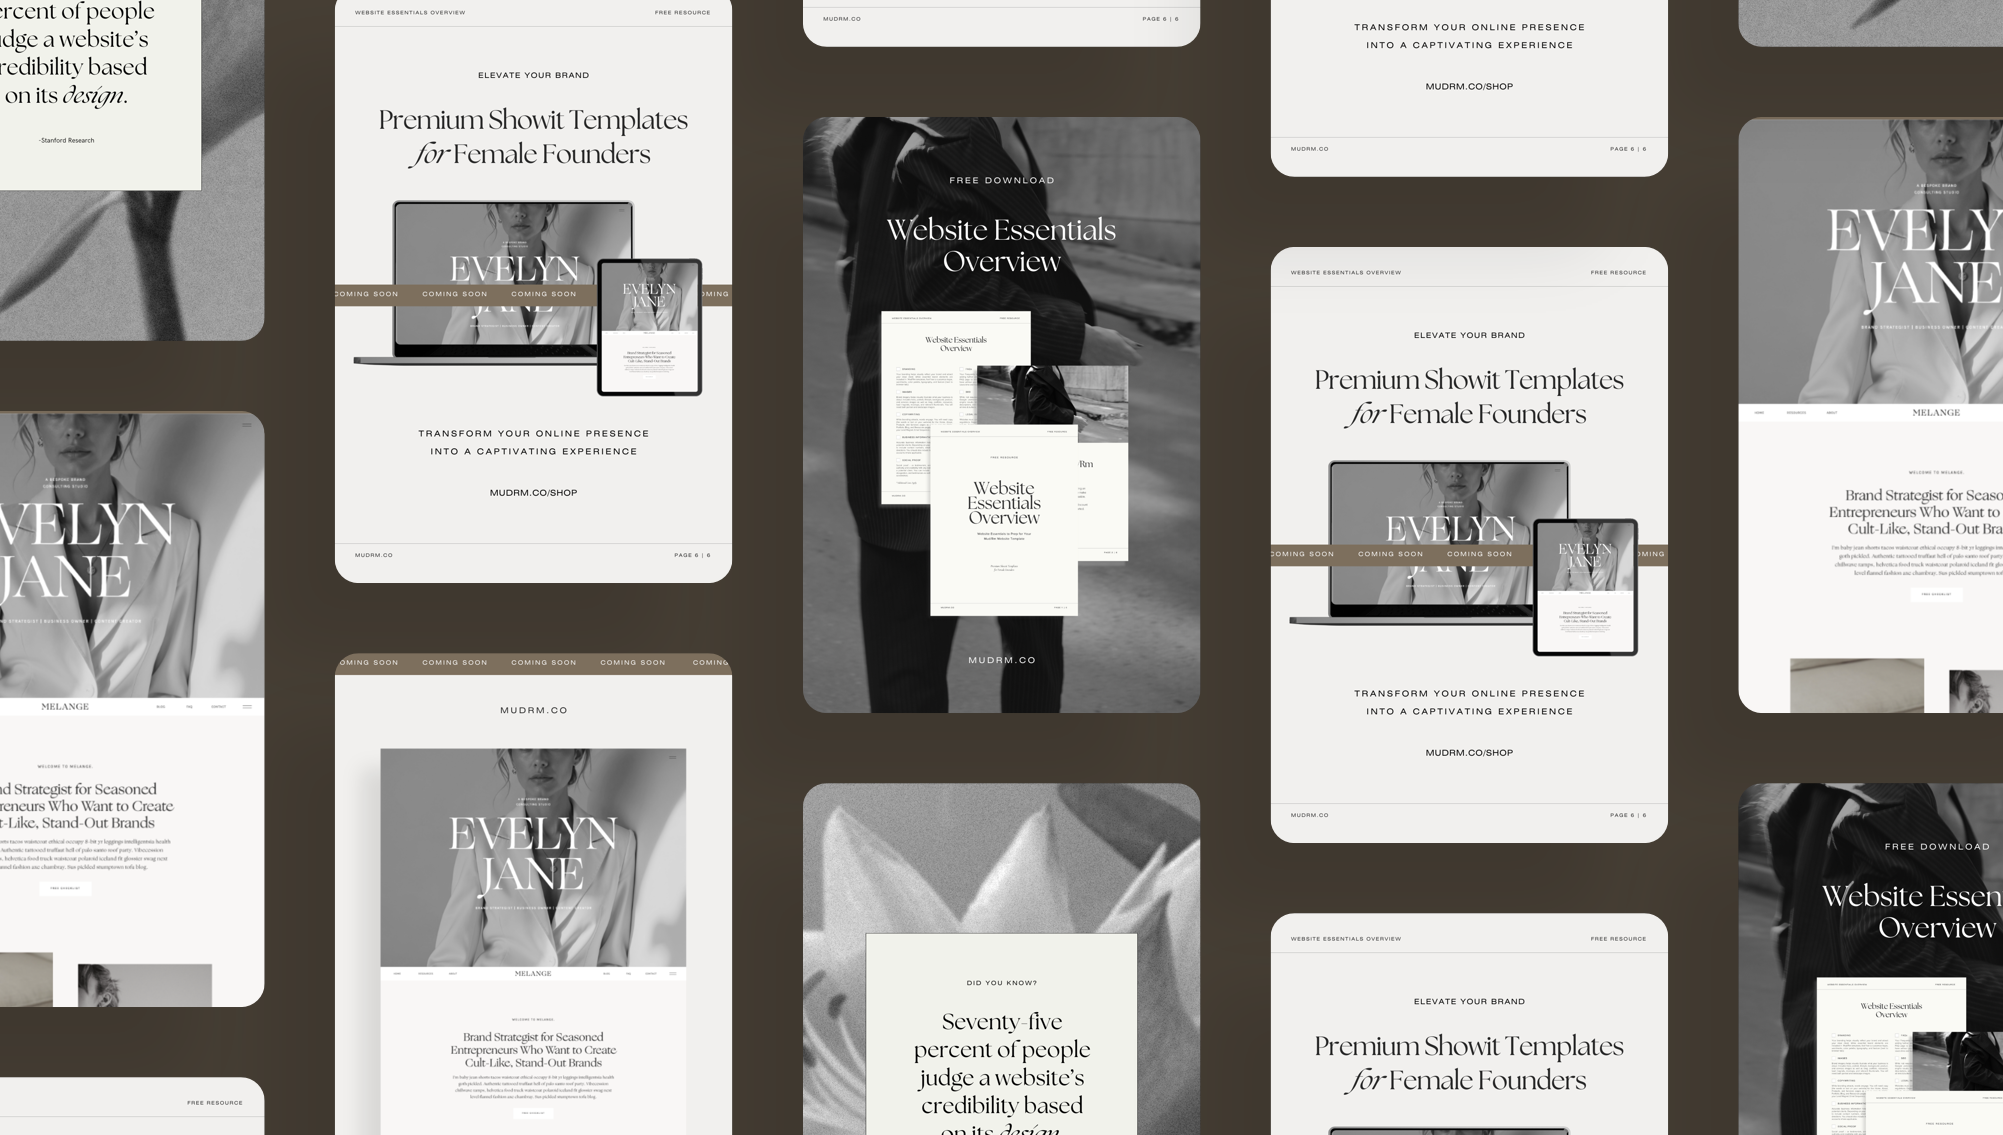
- Create a clear, attention-grabbing title that explains what your pin is about. For example: “Minimalist Showit Website Template for Photographers”.
- Tip: Use keywords that people might search for (e.g., Showit templates, website design, photography templates).
Step 5: Add a Description
- Write a description that expands on your title. Be clear about what you’re offering and how it benefits the user. Include relevant keywords to help with Pinterest’s search algorithm.
- Example: “This customizable Showit template is perfect for photographers looking for a modern, clean, and responsive website. Fully editable with easy drag-and-drop features.”
Step 6: Add a Destination Link
- Enter the URL where you want people to go when they click on your pin. This could be the product page for the template, your homepage, a specific blog post, or your lead magnet.
Step 7: Choose a Board
- Select an existing board from the drop-down or create a new one. If you’re targeting a specific audience, use a relevant board title, like “Website Templates for Creative Professionals” or “Showit Templates”.
- Tip: For your own content, we recommend adding your brand name. For example, “Mud/Rm | Showit Templates”. This will help browsers distinguish between your pinned content and your own created content.
Step 8: Optional – Add Tags
- Next, add tags related to your pin to help Pinterest better categorize it. For example, tags like “website design,” “photography websites,” or “Showit templates” will make your pin more discoverable.
Step 9: Publish or Schedule
- If you’re ready to publish immediately, click “Publish.”
- If you want to schedule it for a later time, click the down arrow next to the Publish button and select “Schedule for Later”. Choose your desired date and time.
Step 10: Monitor Performance
- Once your pin is live, you can monitor its performance through Pinterest Analytics. This will show you how many people are engaging with it and visiting your site.
Tip: To claim your domain, copy the code from Pinterest under Add HTML Tag into your Showit website under Pages > Home > Advanced Settings > Custom Head HTML. Save and Publish to update on your live site. Go back to Pinterest and click “Continue” to verify your domain.
That’s it! You’ve created your first pin. As you create more, experiment with different designs, headlines, and keywords to see what works best.